Tuesday 15 February 2011

Blocks and mortar

The next step was to fit the blocks nicely and mortar them into place. For this we got Dave our neighbour downstairs to come and help. He is a builder and can do this kind of thing standing on his head. Ok, I've never actually seen that but I bet he could. I'd like to see it, for sure. I'm definitely going to think up a situation that would require upside-down brick laying.

So anyway, Dave pitched up back of nine with a load of sand and cement. First he built the outer walls and we mocked up the fireplace:


Next he set the fireplace and the combustion chamber floor:


All that stuff under the block is loose fill vermiculite insulation. After that was done we had lunch. After lunch we built up the front and the riser sleeve:


And that was all the blockwork done. Eight hours on the nail. I think I could have spent a week doing it by myself, easily, and it still wouldn't have been straight or level.

Wednesday 9 February 2011

The Genie of the Oven

Having recognized my lack of experience in blockwork, I got my pal and neighbour Dave to come and spend a day working on it. Dave, being a builder, has plenty of experience with block and he sure did earn his money.

First though, the floor needed to be ready to receive the block. This meant a stabilizing sheet of ply and lots of screws, and several sheets of vermiculite board. You can use loose fill vermiculite for all kinds of things and it is very cheap. Vermiculite board is quite a bit more expensive but it has good compression strength, a rated operating temperature of 900 degrees celcius and provides excellent insulation. Guy and I spent half a day measuring, cutting, screwing down and figuring out how to get the vermiculite board to cover the required area without wasting too much of it. In the end it looked like this:


The last bits to go in were those two small dark triangles. The ones that look like the eyes, under a massive turban. As soon as I fitted them Guy said "Oh, it's a computer-generated genie."

It makes me irrationally happy to think of him down there, insulating the floor and keeping us safe from bakery fires.

Monday 7 February 2011

Laying it out

So the first thing was to lay all the blocks out dry, just to get an idea of how they would go together. I had several goes, and this was the prettiest:


Aerated concrete is pretty amazing stuff. It has a structure like an Aero chocolate bar, lots of tiny holes. This means that those blocks are incredibly light, and have quite respectable insulating qualities. You can also cut them with an ordinary hand saw; you can see some of the various sizes I produced in the picture.

Actually, useful though that is, I soon discovered that it was a potential problem. Every time I started on a new course, I realized that there were at least five ways to go about it and that I lacked the experience to decide how it should best be done. There was a real possibility that in finding out, I was going to reduce my entire supply of block to dust and miscellania.  It was time to get some help.

Friday 4 February 2011

The Steamie rocket oven: a quick intro

Three weeks ago it was my intention to blog our progress if not daily, then at least three or four times a week. But I'm not a natural blogger, and somehow 'blog entry' so often gets bumped onto tomorrow's todo list.

We're now halfway through our projected refitting time. I think we're still on track. It may be a bit of a scramble at the end, but then these things do always seem to be. In the meantime, I've revised my blogging intentions: I will try to write short, pithy posts in the hope that I will actually get around to writing them. Here's the first.

The basic scheme of our oven is to have three baking chambers ('decks', in baker-speak) heated by an efficient wood burner. Each deck is a kind of box-within-a-box, so that the burner can vent between the inner and outer skins. The outer skin is insulated so that most of the heat goes into heating the inner baking space. Here's a cutaway section:

The fire happens down around my shins (the fire doors are open in the picture, but close during use), and burns sideways along the horizontal combustion chamber. The hot gases then head up the internal chimney ('riser sleeve') to the bottom of the first deck. The gap between the inner and outer skins of the decks is pretty narrow (30mm) to transfer as much heat as possible.

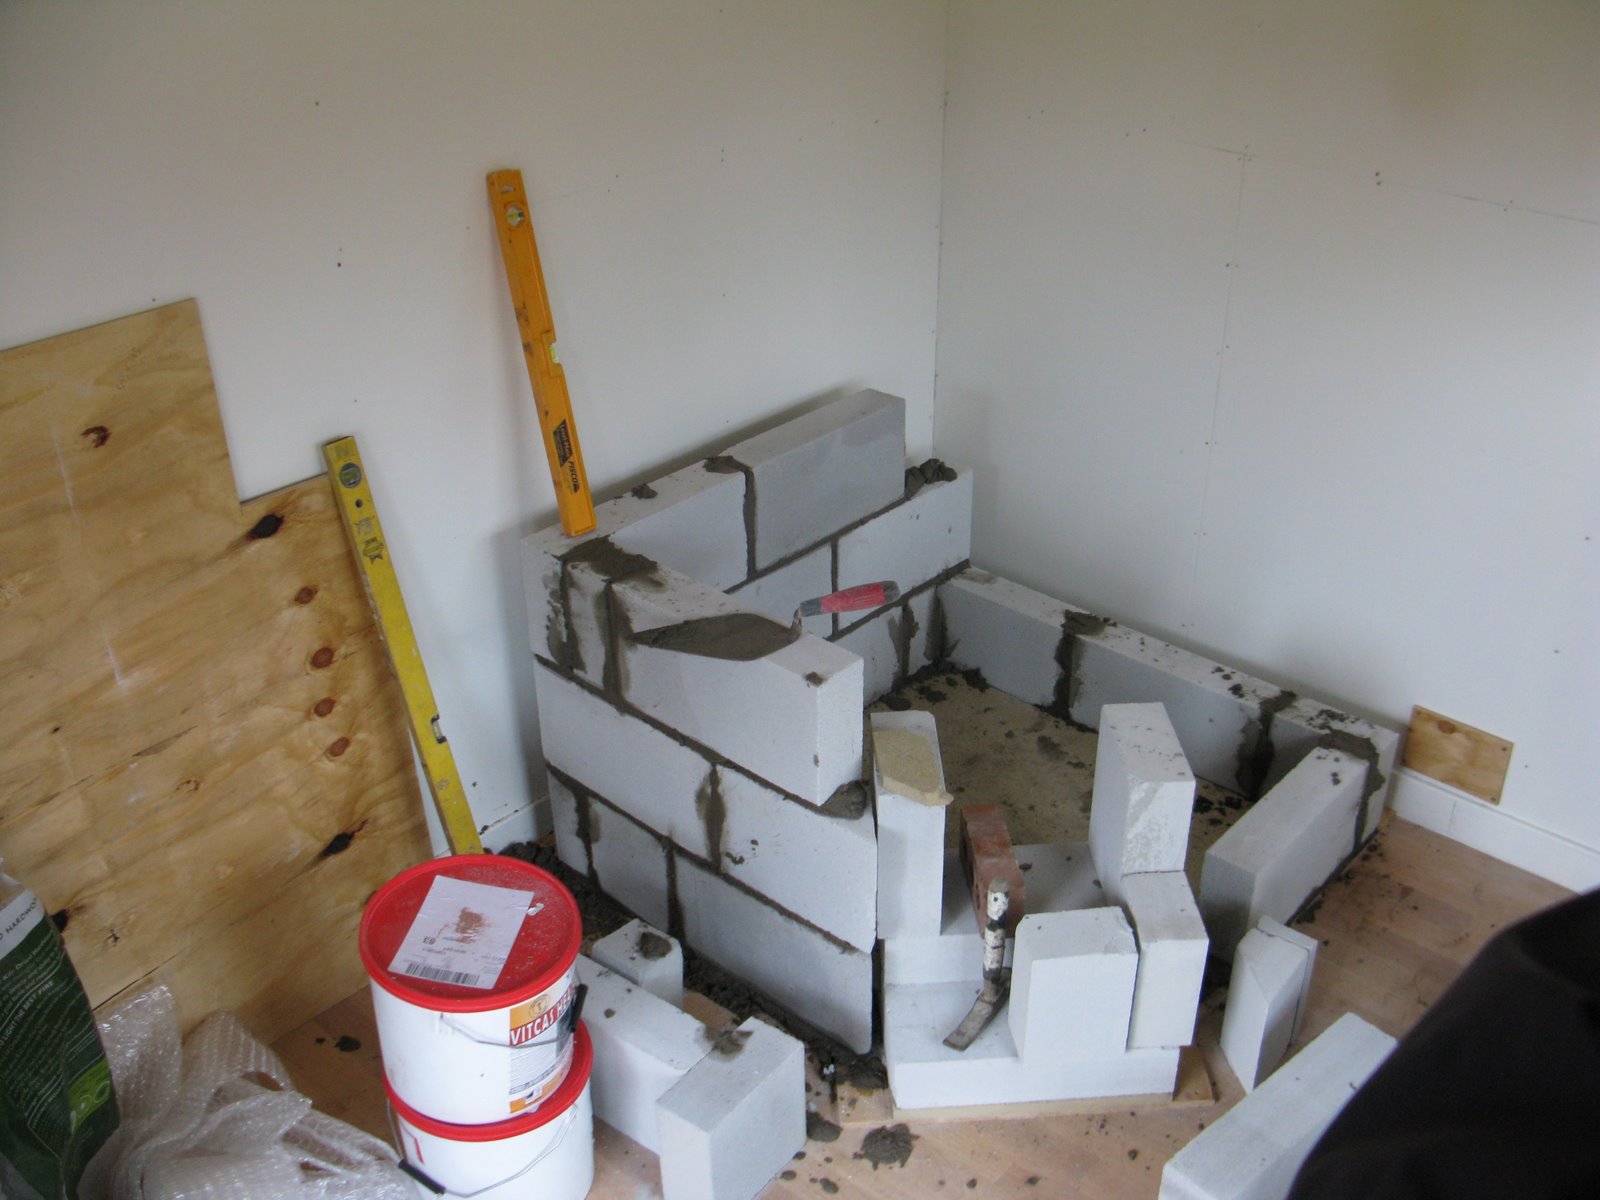
We have finished all of the blockwork and screeded the hot faces We are now waiting for the screed to go off and for the steel decks to arrive from the blacksmith. 'We', I should add, currently means myself, Zillah, Dave (our neighbour, and boss of the building work - more of him later) and Zillah's brother, Guy. Guy is an architect, carpenter, CAD wizard and all round jolly good chap. He did the drawing above (as well as very many others) and has done a fantastic job coordinating materials. If you need anything at all doing to your house or any other building, he's your man.

Next: setting up the blocks.